Zapier recently launched a new feature called Paths that, at first glance, opens a ton of doors to do more interesting things. To give you an idea of what Paths can do inside Zapier, we wanted to highlight a real world example that is helping a marketing agency manage its email drip campaigns and lists.
Email campaigns, while an essential part of many marketing efforts, can be difficult to manage. Keeping track of the different responses and customizing your emails to meet each prospect at each stage of the funnel can be difficult, and the larger your operation gets, the more complicated it is. At some point, it’s almost impossible to manage this properly without using no code tools like Zapier.
What we’re going to cover is a full primer on how to use no code development tools to set up an automatic method that removes clients from your drip campaign after they get around to booking a call.
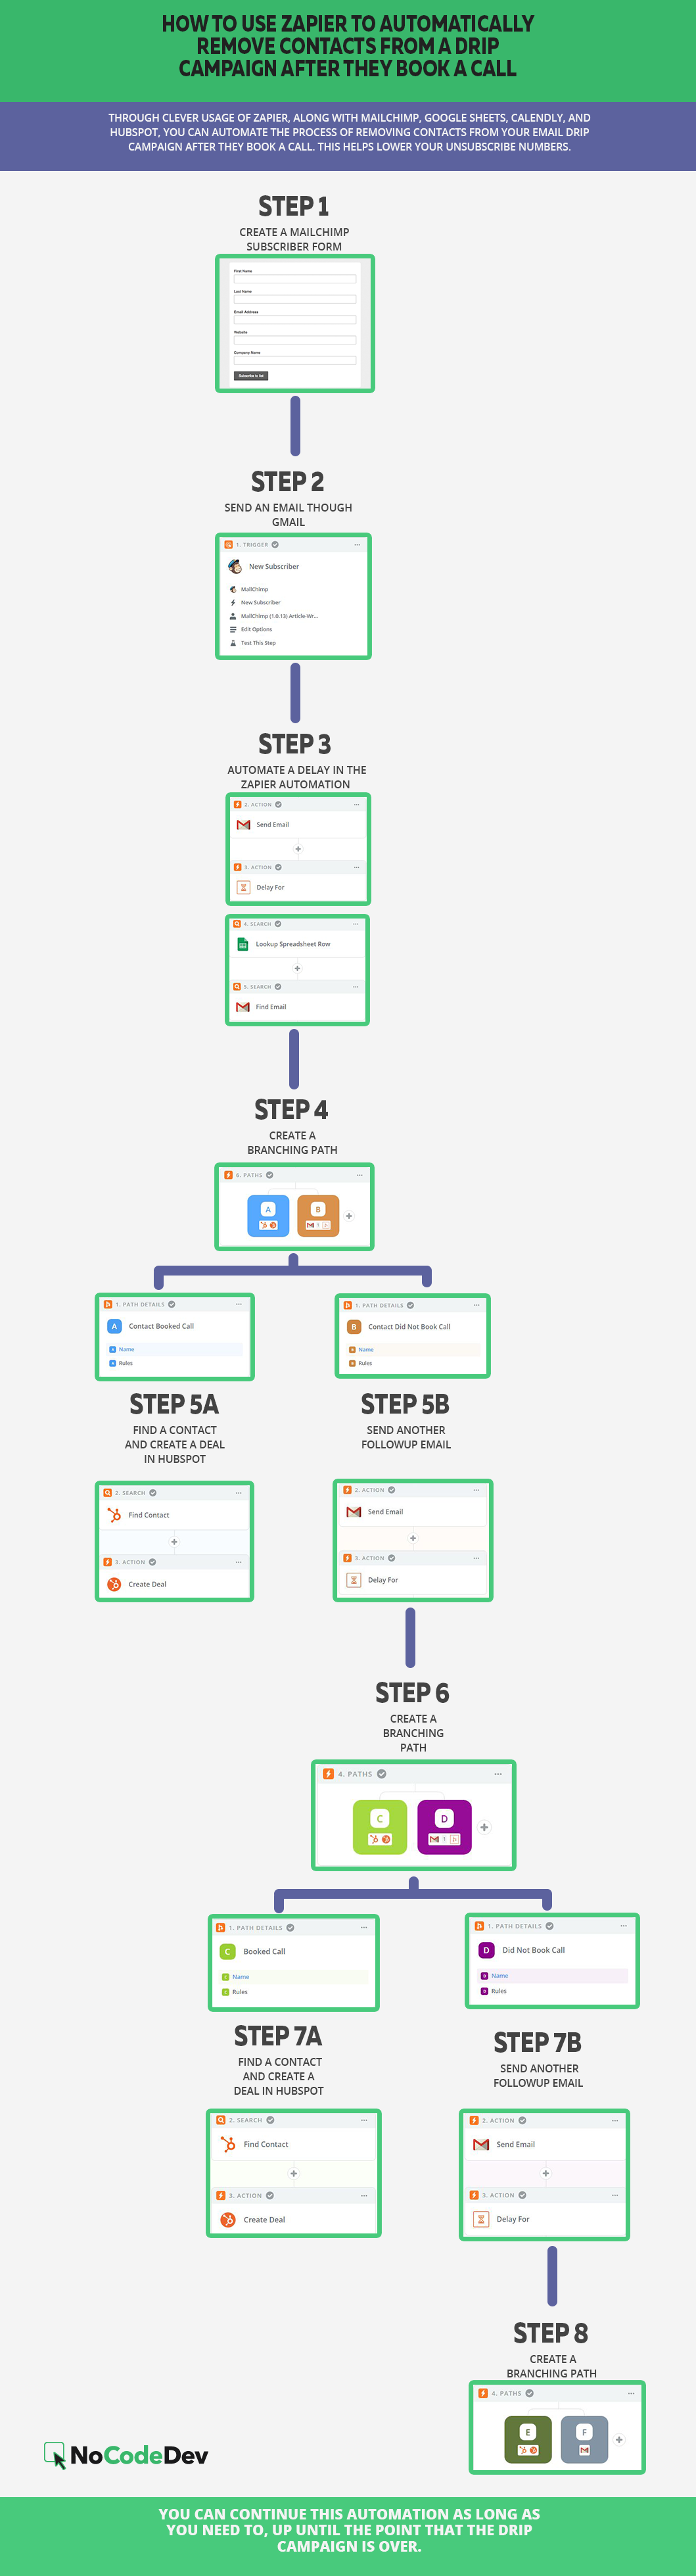
Scroll to the end of the article to see a comprehensive graphic of this workflow.
The Problems This No Code Development Workflow Solves
Before starting, it’s important to mention that this no-code development workflow requires you to use the following tools:
- Zapier
- Mailchimp
- Google Sheets
- Calendly
- Hubspot (optional)
The nice thing about the set of tools we’ve curated for this workflow is that all of these have plenty of use outside of this specific workflow as well. It’s well worth your time to learn a little bit more about each of these outside of this no-code development context, as they can take a lot of the burden off of your planning and marketing efforts.
In this particular context, though, there are three main problems that this workflow will help you overcome. The first, and probably the most obvious one, is integrating automation into your sales process. The work of your sales team is a combination of researching different prospects, reaching out to said prospects, and then charting your progress in both areas. The more time you spend on recording, though, the less time you can spend actually reaching out to prospects and turning them into clients.
This is where the automation piece comes in. By helping nurture existing leads with little effort, it becomes a lot easier for your sales team to focus on getting new leads and getting conversions. In addition, this simplifies the need to have a lot of back-and-forth regarding scheduling sales calls. Taking this effort off of the sales team’s shoulders means they can focus more on the actual calls, as well as high-level followups. Together, this means more wins for your sales team.
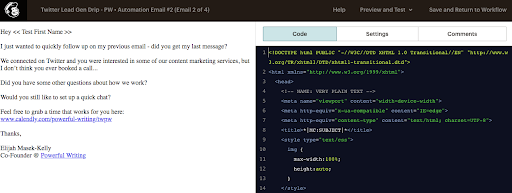
The second element where this workflow comes into play is personalization. Personalization in email has been directly tied to better conversion rates, and it’s easy to see why this is the case. The sheer volume of email sales and marketing materials any given prospect sees on a daily basis makes it very easy to detect when something is catered to them, and when it is templated. For example, Mailchimp templates are among the easiest to detect, and many filters will mark them as such. Technically, you can try and work around this by using HTML code to emulate a plain text look for your email. However, there will always be an unsubscribe button present, and working with code can be a difficult and time-consuming process.
What this workflow does to handle this problem is customizing the email based on dynamic fields rather than raw HTML coding. As a result, no code development gives you the best of both worlds, with email automation for speed and customization for better conversion rates.
The final area where this workflow helps you is overcoming Mailchimp’s unsubscribe warnings. Basically, Mailchimp automatically provides you with warnings when large chunks of subscribers no longer wish to see your campaign. In time, a trend of several warnings may harm your reputation, and even lead to account suspension. By using this approach, you don’t have to worry about being penalized for having high unsubscribe rates. This is an issue inherent to marketing emails, as even a well-constructed one can still have an unsubscribe rate by virtue of being a marketing email. However, while they have an important purpose for many email marketing campaigns, MailChimp’s warnings aren’t as useful for this type of strategy.
What Will The Automated Workflow Do?
As you can see, there are a lot of issues to try and assume that one workflow can solve, but this is indeed the case. In order to manage this issue, here are the key functions that this workflow utilizes.
- For starters, it allows users to send an automated drip campaign to help market their quantified leads. This isn’t terribly unique in and of itself, but where this workflow stands apart is making it possible to automatically remove the person from the drip campaign after they book a call to speak with a sales person. This means less unnecessary emails being sent out, and less potential damage to your brand as a result.
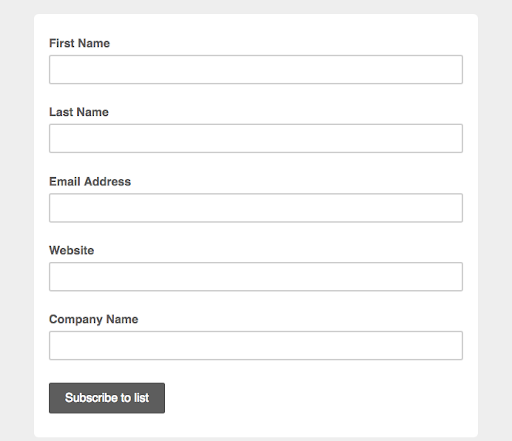
- The entire workflow will be based on a simple input into a basic Mailchimp signup form. This means that the only thing you need to implement is an email address for the field to work. However, you can add more and more details to create additional points of customization.
- Because of the nature of the workflow, you’ll be sure that the leads will receive a new set of personalized emails up until the end of the drip campaign or when they finally book a call. This will prevent potential leads from being lost due to neglect.
- Finally, if you implement the optional Hubspot options here, you can automatically create Deals via that functionality and add them to the Sales pipeline automatically when someone books a call.
Putting The Workflow Into Action
At this point, you’re probably ready to get into the nuts and bolts of this workflow. Remember, you need to have access to the following tools to use this:
- Zapier
- Mailchimp
- Google Sheets
- Calendly
- Hubspot (optional)
One thing you may be asking is why not use just one of these? The fact of the matter is that in order to emulate the functionality of this workflow via any one of the above platforms, like Zapier, Mailchimp, or Hubspot, would require a lot more expense. Think of no-code development as a more accessible way to get the same results.
There are 3 main Zaps you need to put together at the heart of this workflow. We’re going to split them apart so you can see the different steps associated with each.
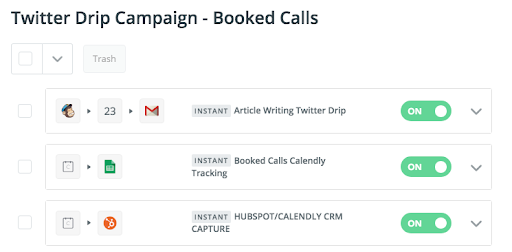
Zap 1: Track All Calls In A Google Spreadsheet Automatically
This is relatively basic. As long as you have Calendly setup, you’re going to get a set of data every time that a call is booked.
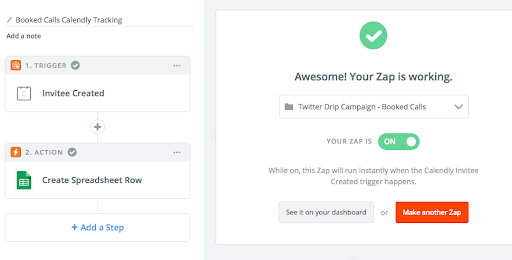
Step 1: Create a Google Spreadsheet ahead of time featuring the different areas you want to profile when it comes to your call. You can see some basic information in the example.
Step 2: Drag and drop the Calendly data into your spreadsheet as each call takes place.

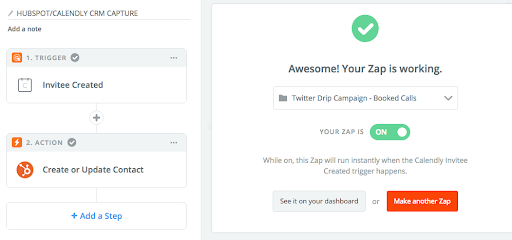
Zap 2: Create Contact In HubSpot CRM (optional)
Note that this is an optional aspect of things, as Hubspot can be a bit cost prohibitive.
Step 1: Create a trigger event in Zapier when you create an invitee on Hubspot.
Step 2: Implement an automatic action to create or update your contact in Hubspot every time you get an invite.
Zap 3: Automate The Drip + Removal Based on Booked Calls
This is the big thing to consider.
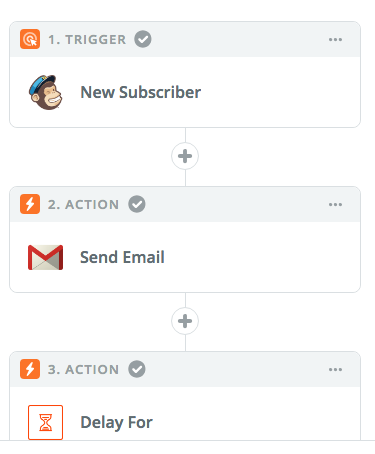
Step 1: Begin by creating a trigger app that occurs every time you get a new subscriber via Mailchimp. Create a manual subscriber entry form. Note that any additional entries you make here can be additional points of customization (the email is technically all you need).
Step 2: Begin the first action, which is sending an email not through Mailchimp, but via Gmail every time someone fills out the form from step 1. You can edit the template as needed, adding copy and material as needed. Note what is essential is that you add a means for someone to book a call with you via Calendly. This will ensure that you get information you can use in the prior Zap. That’s the true goal.
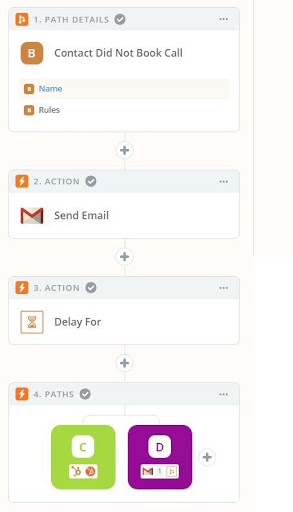
Step 3: Automate a delay in the Zapier automation, which will allow the lead time to either book a call or email back to you. At this point, Zapier will check your spreadsheet and reference if they booked a call or note at the end of the delay. If they reply by email, you will still have to remove their name from the email list automatically.
Step 4: At this point, you have alternative paths and path rules you need to set up in Zapier. At this point, the first path is going to be based on whether they booked a call or not via Calendly. If the Path conditions are met, Zapier will automatically send an email based on the conditions you set. For example, after they book a call, you can set an automated path to stop all emails (ending the drip).
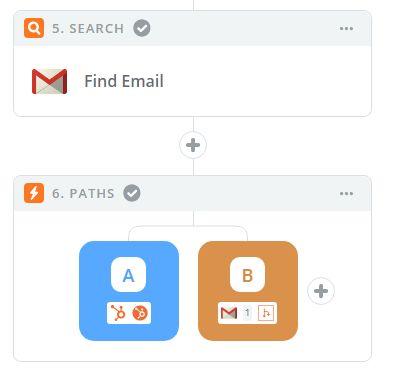
Step 5: You can also set another path if they do not book a call. This allows you to send another email that is customized as a followup.
Step 6: You can repeat steps 3 and 4 implement subpaths for conditions like if the person does not book a call after the second email, and continue this on and on until you end the drip.
Bonus Zaps For Your Needs
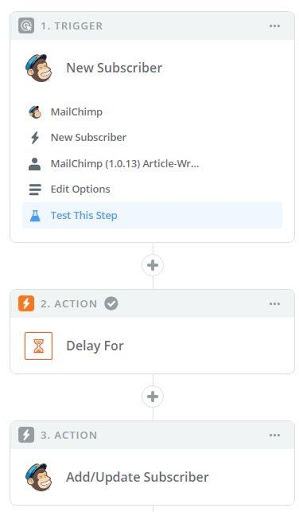
As a quick addition, let’s give a brief explanation of how you can use Zapier to add leads to your normal Mailchimp newsletter.
Step 1: Set up a trigger for anytime you get a new subscriber via MailChimp.
Step 2: Implement a delay of your choice, before automating Zapier to add their name to your newsletter list at the end of the delay.
Making Modifications For Your Needs
To conclude this conversation, it’s important to note that this no code development is a template, and templates are meant to be modified. Based on what you want to do, don’t be afraid to alter elements of this workflow for your needs. For example, customizing the text of the email itself is basic, but you can also make changes to the Google spreadsheet or Mailchimp form so you can end up getting more information to use as needed. Also, instead of using Hubspot, you could implement a Zap that allowed you to get sent a reminder email that someone booked a call so you could act appropriately. This is only the tip of the iceberg, though, as there are many changes and adaptations you can implement to create a stronger email initiative.
Some Thoughts on Paths in Zapier
Paths are awesome! Hopefully this helps you see the type of logic you can bake in to your multi-step workflows. Are Paths perfect for every situation? No. In fact, the more complex your logic gets, and the more paths you have to manage, you’ll quickly wish that you had a more comprehensive view of the entire workflow instead of having to drill down through so many individual zaps and paths. To give you a better sense of what this complete workflow looks like we created a little graphic that demonstrates what we wish we could see in the Zapier product at once, but that instead required us to piece a bunch of individual screenshots together. Overall, Paths will continue to be improved and we are really excited.